
How to Prevent Running Injuries: Tips, Exercises, and Drills

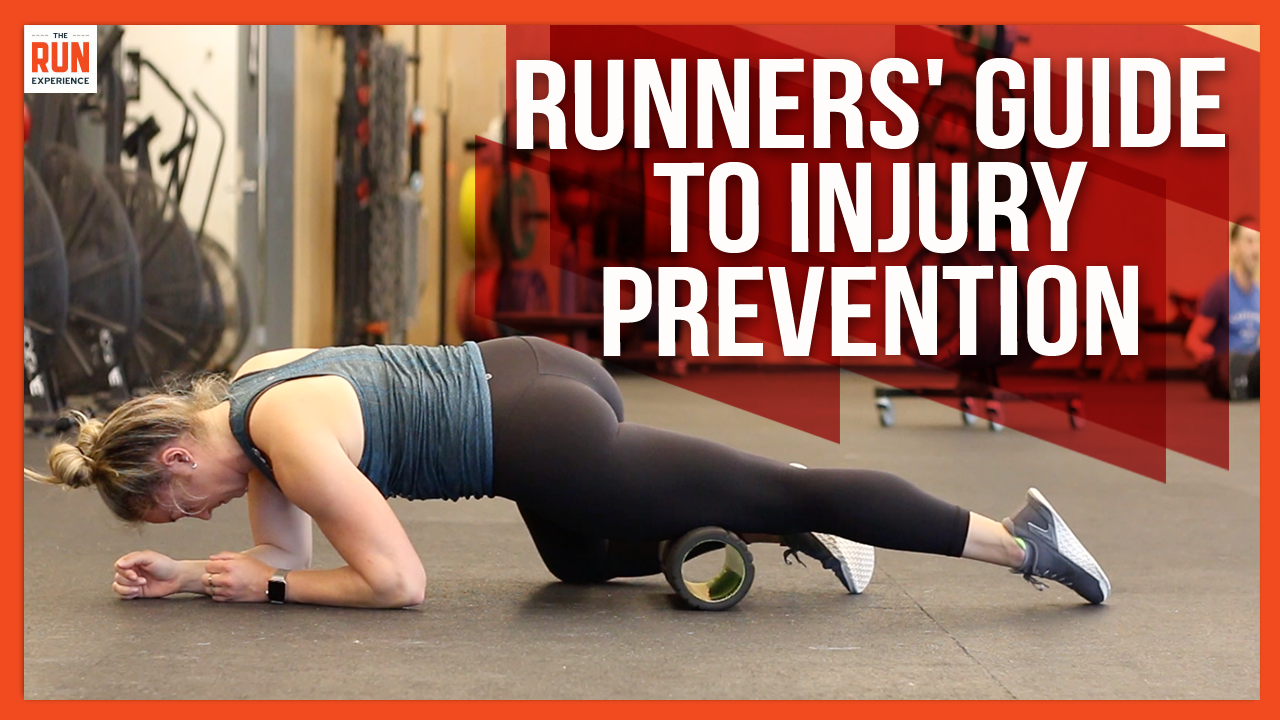
Looking for exercises to prevent running injuries? You’ve come to the right place. Running injury prevention is our top priority at The Run Experience—because you can’t train (or race) if you can’t run.
Let’s face it: injuries suck. There’s nothing worse than building up your training and preparing for a race or event just to have to pump the breaks because of a running injury.
But what can you do to prevent running injuries? It’s just part of the sport, right?
Well, to some extent, yes. But believe it or not, most running injuries are preventable! This guide will help learn how to prevent running injuries with the right know-how, training, rest, and recovery techniques.
With the right injury prevention exercises for runners, there’s nothing holding you back from your long-term running goals!
How to Prevent Running Injuries
Before we dive into specific running injuries, let’s first check out these three habits that will help prevent running injuries for good.
Incorporate these into your routine ASAP—your body will thank you!
Habit 1: Stop & Warm-Up
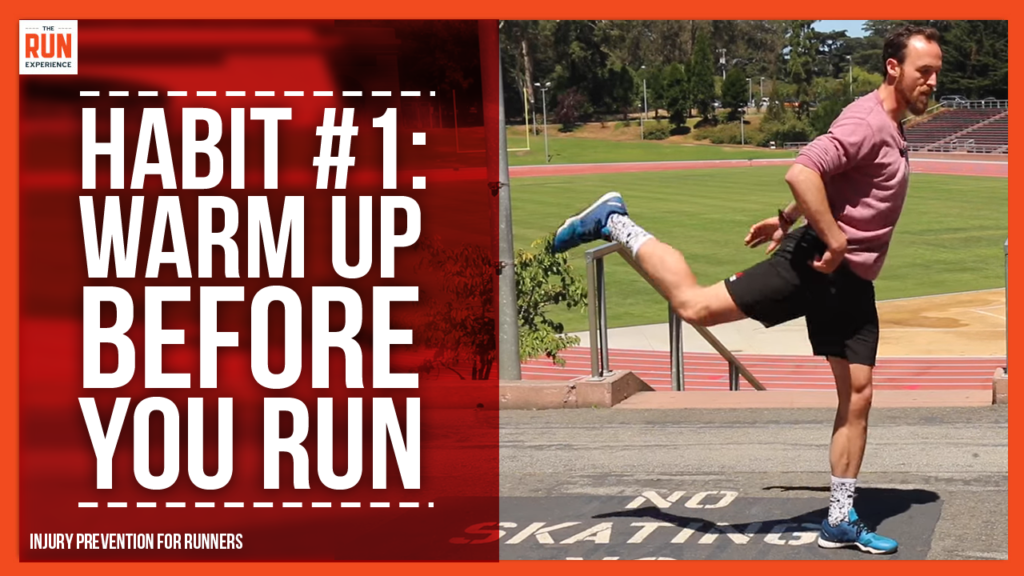
Warming up prepares our body to run more correctly and efficiently. Running requires a large range of motion, and running injuries often occur when we surprise our bodies with that range. A warm-up fixes that by gradually introducing a large range of motion to your body.
Quick and Easy Injury Prevention Warm-Up
- Begin with leg swings and lunges. To start, stand on one leg. If you need to hang onto something, feel free. However, try to work up to standing freely on one leg, as that helps to improve ankle stability.
- Gradually make your swings a little bit bigger. After you’ve completed about 10 swings, kick your leg back into a lunge with your hands on the ground.
- Once there, start to make some hip circles around your front leg.
- Repeat on the other leg and you’re already better off on your run!
For a more complete warm-up, check out this 7-minute follow-along warm-up!
Habit 2: Run With Purpose
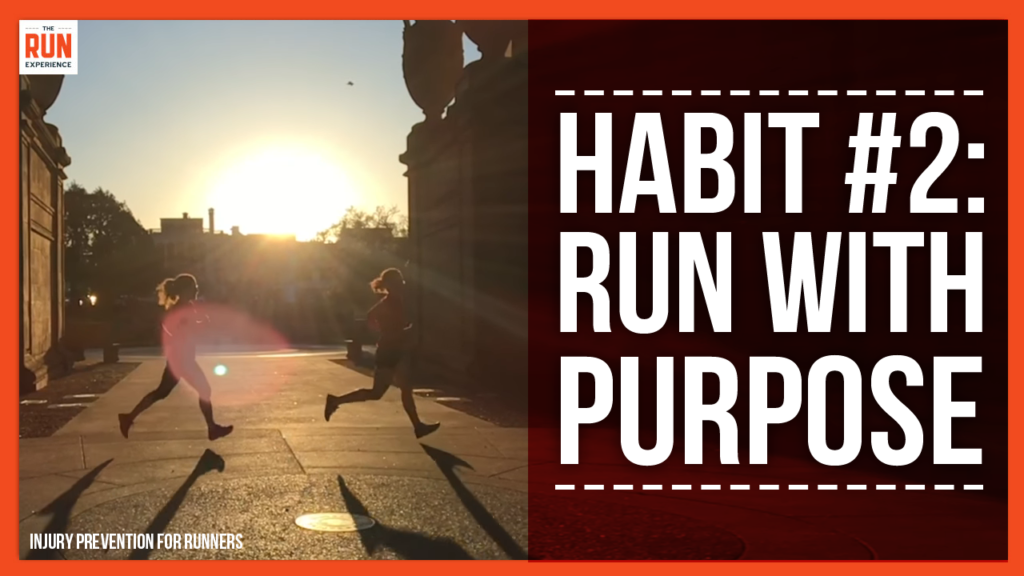
Arguably the most common theme across acute running injuries (as opposed to chronic injuries) is that we’re not paying attention when they happen. To combat this, get in the habit of running with a purpose.
If you’re following a running program, it will likely tell you what to focus on during a run. One day might be speed, the next endurance, or maybe hills, pace, etc. If you’re not on a running plan, or if you just want a different idea, focusing on your breath is a great way to bring purpose to your run.
Nose-Breathing Drill
- Every 5-10 minutes in your run, try breathing only through your nose for one minute.
- This belly breathing will release tension and stiffness that may have formed during your run.
No matter what your focus is, running with purpose draws awareness to what we’re actually doing out on a run.
Habit 3: 10 Minutes of Mobility A Day
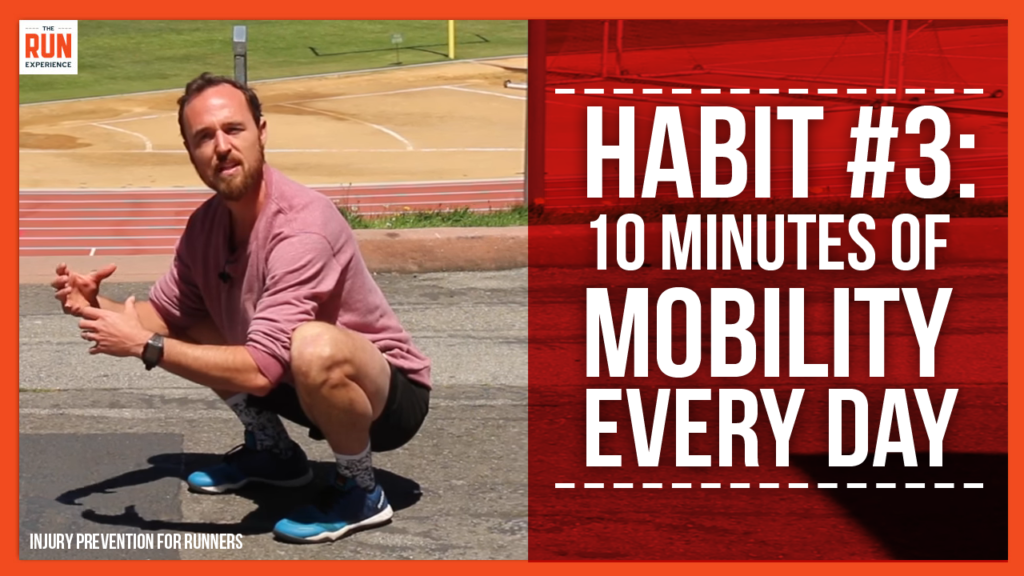
10 minutes of mobility a day keeps the running injuries away. That’s what they say, right?
Our bodies are machines, and machines require maintenance. If we neglect what’s going on “under the hood” for too long, things start to wear down, and eventually, they snap.
We’ll be running one day, and that hamstring pull feels like it comes out of nowhere. The reality is this: running injuries do not just come out of nowhere.
Rather, they brew under the surface for a while, and we only feel them when they get so bad they come to the surface. To combat this, take ten minutes a day to check in with your body and get real with what’s going on.
An easy way to do this is to sit at the bottom of a squat position for a few minutes. This is a relatively extreme position in terms of the range of motion, so it’s asking a lot of your hips, ankles, and knees.
Sitting in this position for a few minutes will really open up those areas. If it’s hard to keep your toes pointed forward in your squat, your ankles might need some more mobility work on their own.
In addition, using a foam roller on your calves during your mobility every day will help to loosen your ankles. Take note of which parts of your body are affected most by this position. This will indicate which areas need more attention (stretching, massage, etc.).
For a look at these habits in practice, check out this video on how to prevent running injuries for good!
Now, let’s dive into how techniques and injury prevention exercises for specific running injuries.
Running Injuries: Fixing IT Band Pain
While running injuries vary from person to person, a tight IT band is one of the most common out there—and it’s certainly no fun.
Why It Happens
Let’s start by examining why the IT band flares up in the first place. The short answer: poor posture. When we start to lose our upright posture during a run, we start to sit in our hips every time we step.
When we sit in our hip, the hip pokes out toward the outside of the body, causing the knee to fall inward towards or across the body’s midline. This strains the IT band, and when it happens on every step, that strain can cause some serious pain over time.
Fixing The Pain with a Foam Roller
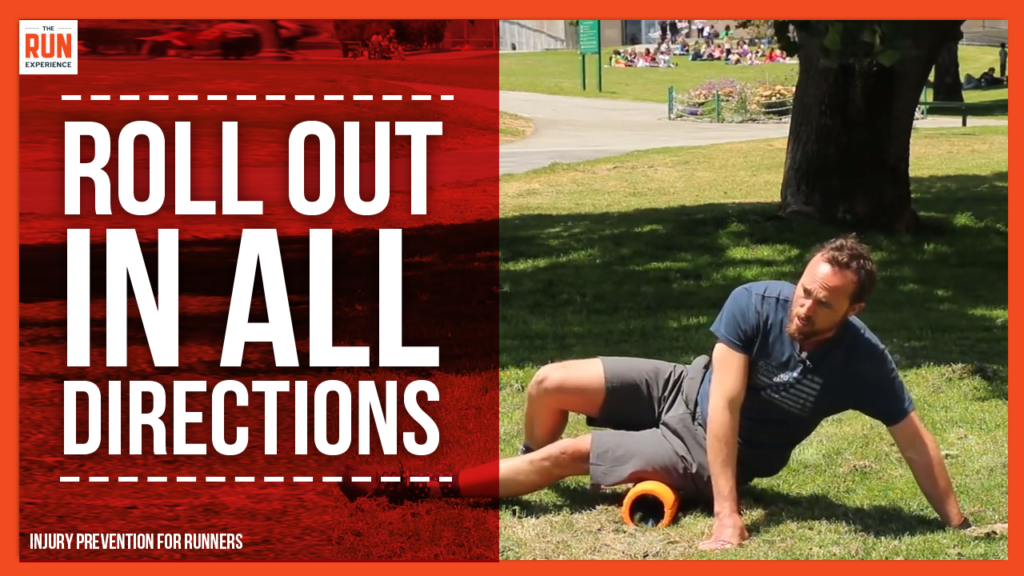
You’ve likely been told to roll out your IT band with a foam roller. But that doesn’t always fix the problem on its own. Instead, roll out both the IT band and the surrounding areas, namely the quad.
We can do this by getting on the foam roller and starting to roll out the IT band like normal, in a north-south direction. When you find a tight spot, start to work east to west on the foam roller. You can even bend your bottom leg, bringing your heel to your butt, to deepen the work.
This will help peel the quad off of the IT band, allowing the muscles to separate will help them recover more fully.
Fixing The Pain: Single-Leg Deadlift
The foam roller helps ease the pain, but this injury prevention exercise for runners is going to help prevent the pain from coming back. To start this exercise:
- Stand on one leg and balance. Already, you can notice if you’re collapsing in your hip–make sure your hips are level.
- Next, slowly start to kick the leg in the air backward, causing you to hinge forward at your hips. You should immediately feel your hamstring and glute fire up on your standing leg.
- Only go down as far as you feel stable,–your chest likely won’t go beyond parallel to the ground.
- If that feels okay, add some weight. Grab a kettlebell, dumbbell, or anything heavy that you can hold easily.
- Holding the weight with both hands, start to repeat that same motion from before. To start, go to where the weight is right below your knee.
Challenge Variation
Pro tip: For an added challenge, go beyond that point until the weight touches the ground, or hovers just above the ground.
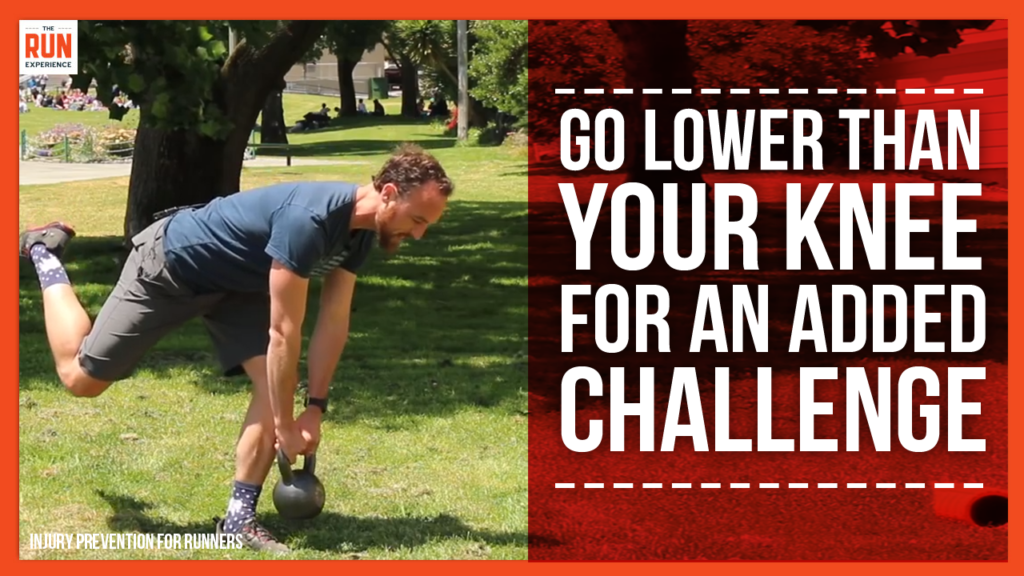
In this version, you’ll bend your supporting knee a bit to keep stable.
Try three to five sets of 5 to 10 deadlifts. Be sure your back stays straight as you lower down, and that it’s not rounding over.
In addition, be sure your hips are staying pointed forward. It’s common to want to open up the hip on the leg-up side.
This exercise strengthens your hips so that they will be less likely to collapse in on your next run.
Now we know why IT band pain happens, how to fix it, and how to prevent it for next time. Incorporate any or all of this into your training plan, and say goodbye to IT band pain for good!
You can also check out our complete guide on how to fix IT Band Pain to learn more.
Injury Prevention Running Exercises for Specific Running Injuries
Runner’s Knee
Runner’s knee, also known as jumper’s knee, is another common running injury, especially among new runners. This is not surprising given that running is really just a series of jumps from one leg to the other.
Runner’s Knee is often marked either by pain on the front of the knee below the kneecap, or on the side of the knee. To be sure you know which type you’re dealing with, check out this Runner’s Knee article from Pain Science.
More often than not, Runner’s Knee is actually a result of weakness around your hips. Because of this, treating and preventing Runner’s Knee requires us to take a closer look at some of the surrounding muscle groups, and we can do that with a few easy tests brought to us by Colorado physical therapist Charlie Merrill.
Test 1: Glutes
For this test, grab a small resistance band and place it around your ankles. These bands can be found at many gyms, and they are also available on sites like Amazon. They don’t cost much and you can use them for far more than just this test, so they’re a great investment regardless.
We’ll do three different movement patterns with the band around our ankles, aiming to do 20 reps of each of them continuously without stopping.
- Start with sideways steps. Keep your feet pointed forward, or even inward, and make sure your body does not lean back and forth as you step. Also, keep a slight bend in your knees. Take 20 steps in each direction.
- Next, move into 20 wide “ice skater” steps. Step out wide with one foot, and then bring your back foot in and step out wide with it. After 20 steps forward, take 20 backward.
- The last of the glutes test is tightrope steps. In between each step, bring your leg out wide before stepping directly in front of your other foot.
Running takes place on a narrow base of support, so this mirrors that and puts your glutes to work while doing so. Again, we’ll do 20 steps forward and 20 steps backward here.
Test 2: Hamstrings
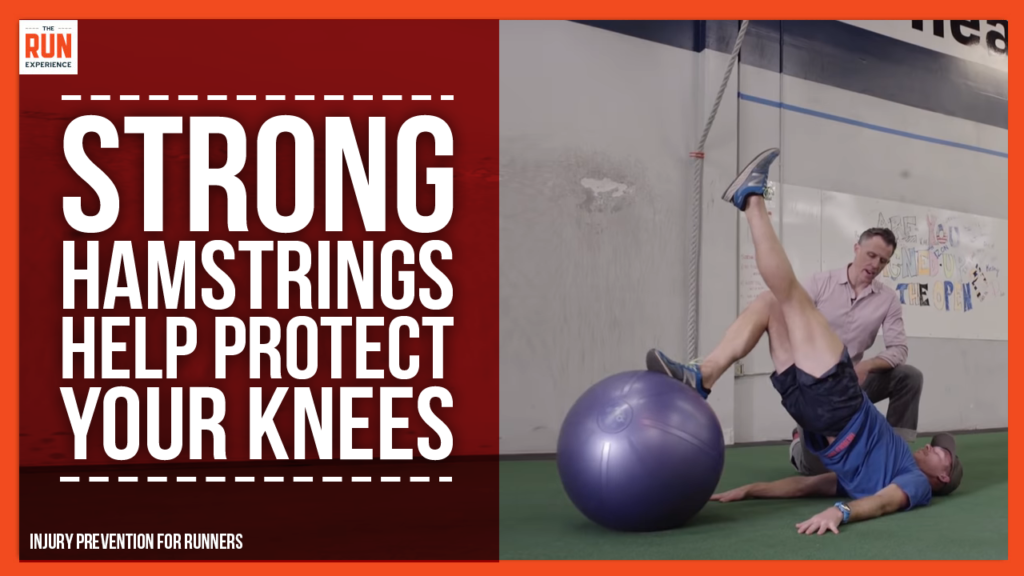
All you’ll need for this test is an inflatable exercise ball. Size doesn’t really matter, but it should be on the firmer side. If you don’t have an exercise ball, you can do this on a wooden floor with socks on.
- To start, place both feet on the ball with straight legs and raise your hips off the ground. Then start to bend your legs and roll the ball into you.
- Keep your glutes squeezed and your abs tight, but this will mostly work your hamstrings. Also, be sure your feet are together and facing forward to ensure both legs work evenly.
- After a few reps with both legs, try the same exercise with only one leg on the ball and the other leg up in the air.
- Aim to complete 20 reps on each leg.
Test 3: Putting It All Together
Lastly, we’re going to combine the glute and hamstring work into a more functional movement. For this one, find a box or platform that comes up to about your knee. A 20” box or something similar usually works.
- To start, stand in front of and off to the side of the box, so that only one leg is in front of it, about 6” away. Take the leg that’s not in front of the box and kick it behind you, so that it is next to the box.
- From there, start to do a one-legged squat on the box. Your hips will initiate the squat, and your shoulders will start to come forward as a counterbalance as you squat down.
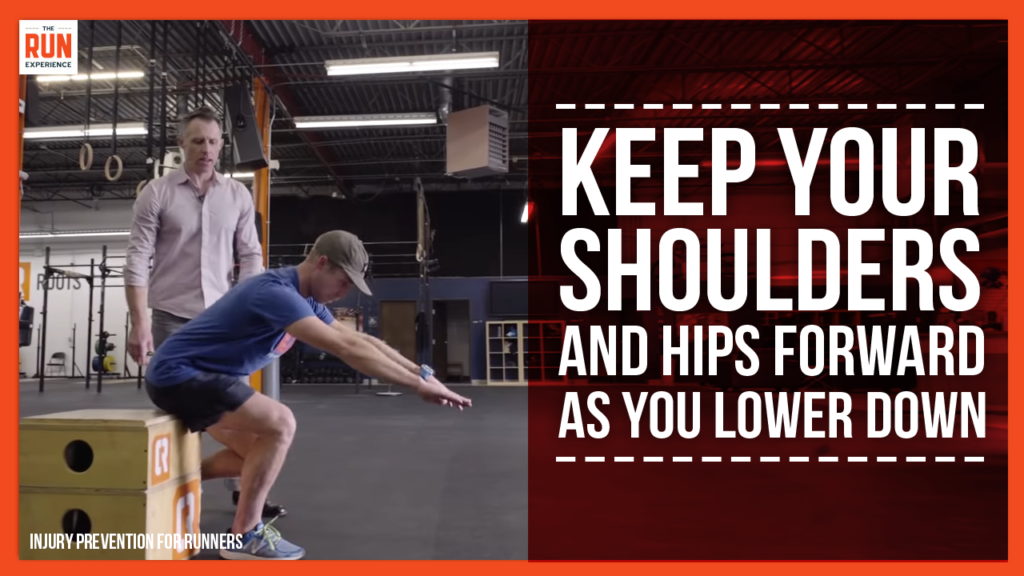
- Leaning forward is completely natural, and necessary. However, be sure that you’re not leaning to one side, which is a common compensation mechanism.
- Make sure that your knee is not falling inward, and that your standing toe is facing forward. Work up to 20 reps per leg with proper form throughout.
Keep in mind: 20 reps is the ultimate goal for each exercise, but it may take a while to get there! Scale back to 10 or 15 at first, and notice which exercise gives you the most trouble. This will be a good indicator of where your weakness lies and what might be giving your knee problems.
For some specific modifications to the tests above, check out this Runner’s Knee video. Now that we’ve covered one possible cause of knee pain, take a look at this video on knee strengthening exercises.
Shin Splints
Shin splints are one of the trickier running injuries, but they too are quite common. According to Runners World, there is no clear consensus as to what exactly shin splints are.
Some scientists believe they are the result of small tears in the muscle pulled off the bone, while others believe they are the result of inflammation issues on or around the shin. One thing is clear–they are usually the result of doing too much too soon.
To avoid this painful injury, apply some of the tips in this video on preventing shin splints. In addition, be sure your shin pain is not actually being caused by a calf injury. This video on calf injuries has helpful tips on assessment and prevention.
Plantar Fasciitis
Plantar fasciitis is another common running injury. Simply put, plantar fasciitis is, more often than not the injury behind heel pain.
As we have seen with other running injuries, the cause of plantar fasciitis is sometimes at the site of the injury, in the foot itself. However, it is often a result of weakness elsewhere, namely the hips or the lower back.
As we saw with IT band pain, sitting in our hips when we run causes the knee to fall inward. This effect often extends even farther down to the foot and causes runners to roll inward on their feet as they step.
As explained by The Mayo Clinic, the plantar fascia acts like a “shock-absorbing bowstring.” Rolling inward on the foot, also known as pronating, adds tension to that bowstring. Over time, that tension causes minor tears. Repetitive tearing eventually leads the fascia to become inflamed, causing the pain we associate with this injury.
To figure out what’s causing your heel pain, take a look at this video with 3 steps to fix plantar fasciitis. In addition, check out this longer and more in-depth video on how to fix plantar fasciitis.
How to Prevent Running Injuries (Again)
Alright, you’ve conquered your injury and are ready to run again. But what is the smartest way to come back to running, and to ensure the same injury doesn’t repeat itself? What can you do to prevent a recurring running injury?
Or, to ensure that compensating from the former injury doesn’t lead to a new injury elsewhere?
Before we get into some tips, let’s remember that your injury likely did not come out of nowhere. So, as you return to running, try to identify habits or tendencies that may have led to your injury, and use this fresh start to set you on a better path toward smarter running.
Are you warming up properly? Are you taking some time to mobilize after your run? Be sure your habits are setting you up for success.
1: Warm-Up
No surprise here. If you were not warming up properly before your injury, adding this in is a must! Either before you head out the door, or about 5 minutes into your run, take a few minutes and go through a warm-up.
We’ve got some tips on warm-ups in this post. For some added inspiration, check out this video on how to warm up before you run.
2: Strength Work
Shift your mindset. Instead of thinking of yourself as a runner, think of yourself as an athlete who runs. Stronger muscles lead to better running. Oftentimes, improper run mechanics are a direct result of weakness somewhere.
Try these simple, effective injury-prevention exercises for runners: squats, lunges, push-ups, and burpees. These ignite the whole body and yield big results. Whatever your strength training regimen becomes, try to incorporate it at least 2 days per week.
3: Re-Examine Your Running Technique
Check-in with your run mechanics all throughout your run. So many of us start a run with great posture and good mechanics. But what’s going on 30 minutes in? 45? A quick fix for this: every 5 or 10 minutes, stop and do something that is not running. Try doing 5 squats, or maybe a lateral shuffle.
Doing this will reawaken those muscles that may have gone to sleep while we were running, and it sets you up for a fresh start. Think of this as hitting the re-set button on your run mechanics.
4: Ditch The “All Or Nothing” Mindset
When returning to running after an injury, it’s common to give yourself distance or time goals. Do your best to let go of that. Instead, give yourself bail-out options.
Listen to your body and stop when it tells you to. This way, you’ll avoid re-aggravation of or even re-injuring whatever body part gave you trouble in the first place.
To do this, avoid “out and back” runs, as they do not give you much of an option if you need to stop early. Rather, find a track or run around the block. This way, you can still hit that goal if your body allows, but you can also stop and stretch or do strength work if and when your body starts saying no.
As a general rule, be smart! Use your return to running to fix problems that were there before, and to begin better habits. Don’t overdo it too early on, and trust the process!
Learn How to Prevent Running Injuries
There are two approaches to dealing with running injuries: prevention or cure. You likely didn’t come to this post trying to prevent every possible running injury—you probably have a specific current (or semi-current) injury you’re concerned about.
Hopefully, we’ve helped with that.
However, now it’s time to prevent the other injuries you’re not even thinking about yet.
Injury prevention is made easier with tips from our expert coaches. We’ll show you more (and tailored) exercises to prevent running injuries.
Have you heard about the new TRE mobile app yet? Be sure to download our app for access to new workouts each week and a robust library of training resources!