How to Start Running: A Beginners Guide to Running

Not sure how to start running? You’re not alone. Going from couch to 5K or half marathon is a journey, and it helps to know what to expect along the way.
We’ll teach you everything you need to know on how to start running for beginners. This ultimate guide has everything beginner runners need to know to lace up their shoes, get outside, put the miles in, and avoid injury.
Let’s get your running journey started.
5 Tips on How to Start Running
- Keep it realistic!
- Set a goal.
- Make a specific plan.
- Choose how you’ll be accountable.
- Have a backup plan from the get-go!
They say that the hardest part of running for beginners is getting those running shoes laced up, but what’s even harder than that is getting started with something you’ll stick to!
For beginners, just getting out the door is a big feat. Whether you’re focused on weight loss or training for a half-marathon, the first step is making a commitment.
To help you accomplish that feat more than just once or twice, we’ve listed a few tips below that we are confident will help you start a run program in a sustainable way!
1: Keep it realistic!
We all have different goals, schedules, and lifestyles, so be sure you’re starting a running program that works for YOU. Training of any sort needs to be the perfect puzzle piece to fit into YOUR life and limit your risk of injury if it’s going to be sustainable.
2: Set a goal.
Setting a goal will help hold you accountable, and allow you to track your progress and stay motivated.
Think about why you’re starting to run, and then set a concrete goal based on that! It could be a specific race or distance you want to run, a mile time you want to hit, a pair of pants you want to fit into, whatever works!
If you don’t have a set goal in mind, sign yourself up for a 5k race in a few months, and start there.
For some extra help, check out these Couch to 5K Training Tips!
3: Follow a beginner running routine.
Once you have your goal in mind, start working on a training plan for beginners. If you’re following a pre-made plan online or in a book, be sure to customize the plan and modify it so that you’re not going out of your way to follow it.
If you need a good jumping-off point, check out our beginner running plan!
The more specifically you design your plan, the easier it will be to follow!
To get really specific, you can start to think about your running preferences. Will you want music? If so, get to work on creating the perfect playlist, or search for one that is pre-made. What time of day will be best to run?
To get the wheels turning on this, take a look at the image below, shedding light on what many of today’s runners prefer. All of the info comes from Statista and RunRepeat.

4: Choose how you’ll be held accountable!
It could be a training partner, a friend or loved one who will check in with you daily or even an online running group you join!
If that doesn’t work for you, simply write down training schedule, and check it off as you go.
Accountability does not have to be a public display! In fact, as you can see in the image above, most runners prefer not to share their runs on social media.
No matter how you do it, just make sure you have a record of whether or not you’re sticking to your plan. And if you’re not, perhaps you need to modify it and make it more realistic, or just find someone or something that MAKES you do it!
5: Have a backup plan from the get-go!
Life never goes according to plan, so expect that! Make a contingency training plan should you have to stay late at work, or if you get sick, etc. And be flexible!
This way, you’ll still be on track to reach your goals, and will be less tempted to just give up on running when one thing goes wrong.
Different plans will work for different runners, and it may take a bit of trial and error. But stay patient, and be confident that the best running plan for beginners is not one size fits all.
For some added inspiration, watch these 4 tips to keep running fun!
Running Form For Beginners
Now that we’ve got a plan, let’s make sure pain + injuries aren’t going to sideline us after Week 1! Having a correct running form is the easiest way to avoid injuries and make running a habit, not a phase. Let’s dive in!
To make sure everything is in line, we’ll start from the top and work our way down.
- Head position
- Shoulder position and arm swing
- Hips
- Legs and feet
Head Position
Because so much of our time is spent at a computer or on our phone, it’s become natural to slouch a little in our everyday life. But running rounded or slumped over will take a toll on your whole body, so it’s important to make sure your head is in line when you run.
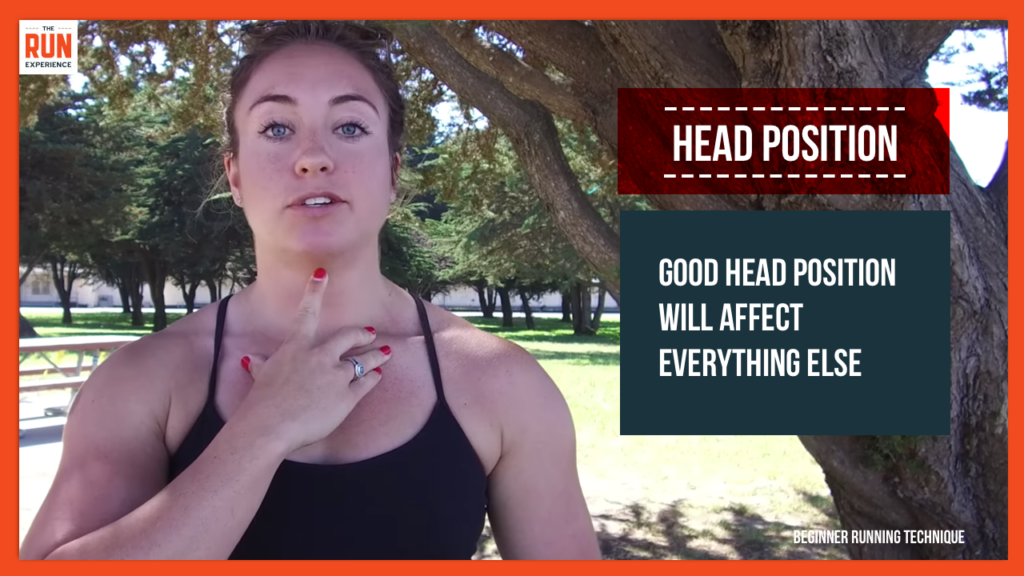
To make sure, try this trick! Place your middle finger and thumb across your collarbone, and then extend your pointer finger upwards, making a tripod for your head.
Your pointer finger should fall right underneath your chin. If it doesn’t, adjust so that it does, and try to maintain that position throughout your entire run.
Shoulder Position & Arm Swing
Shoulder tension also contributes to that slouched position. Luckily, it’s an easy fix! When you’re running, simply remind yourself to relax and roll back your shoulders, periodically checking in to see if they have crept up since you last checked.
As for the arm swing, beginning runners often let their arms swing across their body, which actually reduces the power of the swing!
Instead, be sure your arms stay on the sides of your body, just swinging forwards and backward, with your head up tall and your shoulders back.
Hips
Our hip position is a big determinant of stride length and form. For a good, long stride, your hips need to be upright, with your hip bones facing forward. Imagine your hip bones were the headlights on a car – they should always be shining forward!
Keeping your pelvis upright will ensure a long stride, and it gets those hamstrings and glutes firing, creating a more even distribution of weight on the legs.
As you can see in the image above, Coach Holly’s hips are pointed down towards the ground, causing her whole body to slouch, and reducing her stride length.
We also want to avoid sitting into our hips as we land on our legs. To do this, focus on keeping the same amount of distance between your knees throughout your run.
If you are running along a line on the ground, keep your feet equidistant from it the whole time, or just imagine you’re doing this if there is no line.
If your feet start to drift closer to your center as you run, chances are you’re collapsing into your hips as you land. Periodically check-in and make sure there is adequate distance between your knees.
Legs & Feet
For leg technique, start by focusing on how your legs come off the ground. Ideally, our run stride should be right in the middle of a “high knee” and a “butt kick.” So aim to pull your feet up right underneath your pelvis, without the run looking too much like either of those exercises.
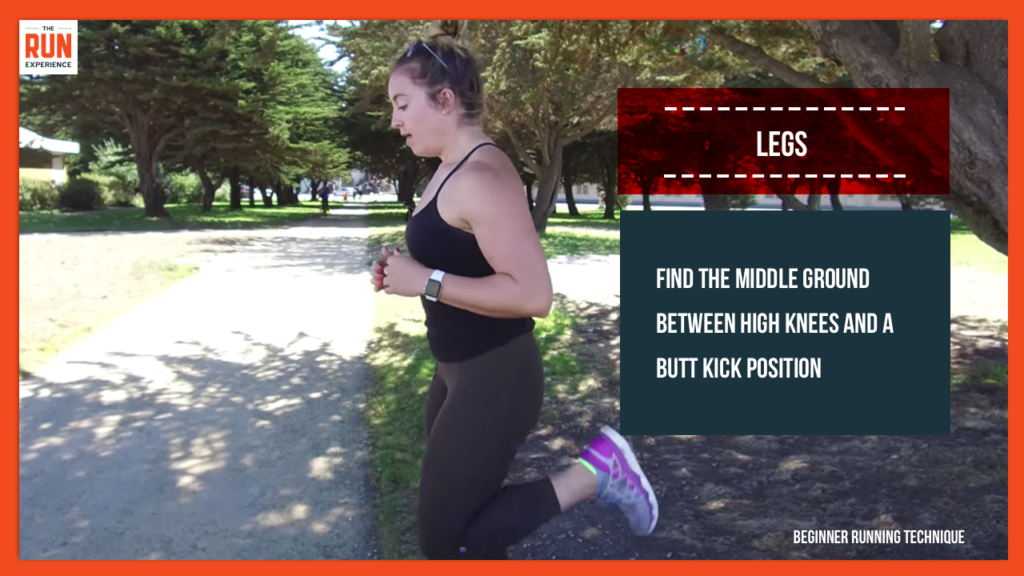
Now, let’s talk about our feet! If your feet are scuffing the ground as you run, it’s because you’re not picking your feet up high enough off the ground. To combat this, focus on the pulling technique mentioned above.
If you’re landing too heavy on your feet, sort of stomping on the ground as you land, try to pick your feet up a bit faster, creating a quickness and lightness in your run.
A Workout to Practice Beginner Running Technique
Let’s put all of this together, shall we?! To do this, head out for a 30-minute run. After every 5 minutes of your run, spend your 6th minute focusing on one of these body parts. Notice what your body does naturally, and fix it accordingly.
So after your first 5 minutes, spend the next minute thinking about your upper body. Repeat that again only spend the next 6th minute thinking about your hips. Continue this pattern all the way down to your feet.
Finally, spend the last 6 minutes of your run letting all of this come together, noticing the parts of your body that need the most adjusting mid-run!
Once you start to understand proper run form throughout the whole body, check out this video on the secret to your stride to dive a bit deeper and understand the lower body mechanics that will help you run farther and faster!
Drills to Practice Your Best Running Form
Drills are one of the easiest ways to work on running form because they allow us to break down our form outside of the context of a run.
It’s tough to analyze run form mid-run, so let’s take a look at a drill that will lock in proper form, ultimately making your runs faster, easier, and preventing running injuries.
- Balance
- Balance with hops
- Balance with lateral hops
Balance
We’ll start by simply balancing on one leg for 30 seconds. This is an easy way to find out what our natural tendencies are.
Does your weight naturally fall to one part of your foot, do you lean in a certain direction?
If just balancing is too easy for you, challenge yourself by turning your head to the right and left, and looking up and down. If that goes well, simply close your eyes for even more of a challenge.
Balance with Hops
Next, use any small, narrow object as a marker placed horizontally on the ground, and practice hopping over it, still on one leg.
You’ll do 15 reps on one leg, with 2 hops (forward and then backward over the object) counting as 1 repetition. And then you’ll repeat on the other leg, and you’re going to repeat that whole set 3 times.
Be sure to check out where your weight is landing after every jump – is your heel coming all the way to the ground when you land, is your body falling forward or backward?
Balance with Lateral Hops
After 3 rounds, turn your object vertical on the ground and repeat the drill hopping side to side over the object.
Again, 15 reps per leg per round, with 2 hops (right and left) being counted as 1 rep. Repeat for 3 rounds.
Notice here if your knee is caving in when you land, indicating you’re rolling towards the inside of your foot, or if your weight falls more toward the outside of your foot instead.
For all of these hopping drills, take note of your movement. On the forward/backward hops, did you travel right or left at all? And on the lateral hops, did you travel forward or backward at all?
Movement of this kind likely indicates a weakness somewhere, which could be causing discomfort during your runs!
Running For Beginners: The Drill To Fix It All
Now that we’ve identified our tendencies, let’s try this drill to balance everything out. Incorporate this drill on strength day, or at the end of a short run.
- Step-Ups
- Jumping lunges
Step-Ups
We’ll start with slow step-ups onto a box or bench. Find a box or bench at a height that’s comfortable for you to step up onto, and place one leg on top of it.
Leaning forward over that leg, step up very slowly onto the platform, without using your bottom leg at all. Once you’re on top of it, engage your glutes and stand up tall.
Then, come down the same way you came up. Hinge over at your hips, bend your standing leg, and slowly lower your bottom leg back to the ground.
Safety tip to protect your knees: be sure that your knee is right over your ankle while you’re stepping up and down, and that it doesn’t fall inward.
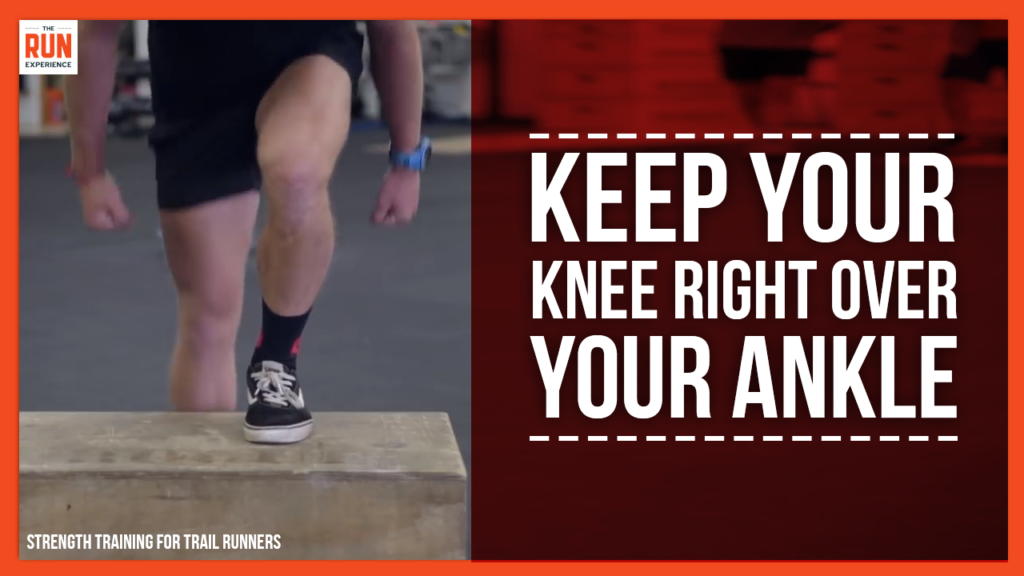
You’re going to do 10 of these total, alternating legs every time!
Jumping Lunges
Right after you’re finished with the step-ups, find a lunge position on the ground, bending your front leg at a 90-degree angle, making sure your front knee is directly over your front ankle, not in front of it at all.
Run Workouts For Beginners
Interval Run Workout For Beginners
A “running workout” isn’t often something beginners think about – a run is a run, and we often only change the route and the distance.
And there’s nothing wrong with that! However, interval workouts are a great way to practice tempo, which will gradually increase your run speed in a way that feels more sustainable than just taking off for a sprint.
This interval run workout for beginners is also going to help build your confidence when it comes to holding your speed for a longer period of time come race day!
Interval Workout For Runners: Ladder Format Overview
For this workout, we’re going to be increasing the amount of time we run for, and then decreasing it, with our rest time always being 1 minute long.
Before we get into the ladder, start with a 5-minute warm-up run, at a comfortable speed.
We’ll start the workout by running for 1 minute, and then walking for 1 minute. Then we will run for 2 minutes and walk for 1 minute, then 3 minutes, and then 4 minutes of running, always walking for 1-minute in between runs.
After that, we’ll work our way back down the ladder, running for 3 minutes, then 2, and then 1, keeping rest time the same at 1 minute.
Interval Workout for Runners: Details
Now that you know the format, let’s talk about intensity. As we climb up the ladder, we want an effort level of 7/10, 10 being maxed energy expended.
This means that you could still talk while you run, but probably only a few words before you would need to take a breath.
Try and hold that through all of your ascending runs, through the 4-minute run.
Next, as we climb down the ladder, we’re going to bump up the effort level. As the runs get shorter, try to attack them with a bit more speed, knowing that you are running for less time.
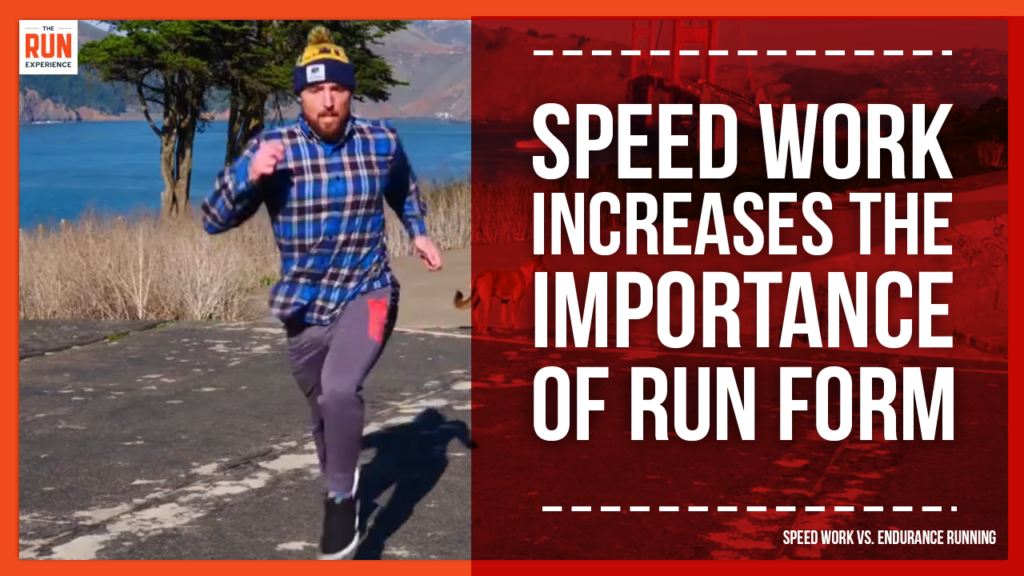
Don’t worry about exact speed or splits for this one, just focus on your own perceived effort level, and push yourself to speed up as the runs get shorter.
You’re only doing 16 minutes of running in this workout, so keep that in mind! You can do it.
Once you’ve finished your final minute of running and then of walking, give yourself a 5-minute cooldown jog, at an easy pace to gradually slow your heart rate.
Throw this workout in once or twice a week while you’re training, and your distance runs will start to feel faster and easier over time. Enjoy!
Treadmill Workout For Beginners
Consistency is what’s going to turn us beginner runners into seasoned pros, so don’t let the weather or other outdoor conditions affect your training.
To help you out, we designed this treadmill workout for beginners. Let’s dive in!
Treadmill Running Workout: Warm Up
We’ll start with an easy, 3-minute jog. The speed on this one will vary from person to person, but make sure you could talk to someone easily throughout the whole 3 minutes, we’re not pushing it quite yet!
Next, increase your speed by about 1mph, and hold it there for another 3 minutes.
Treadmill Running Workout: Cadence Drill
Before we get going on intervals, we’re going to do a cadence drill to really wake up our muscles and get our feet turning over.
Set the clock for 5 minutes, and at the top of each minute, spend 30 seconds counting how many times 1 of your feet hits the ground.
Then for the second 30 seconds of that minute, no need to count just run comfortably.
Repeat the 30-second count at the top of every minute, aiming to increase your count by 1 each minute.
The goal here is not to speed up, but rather to shorten your stride and encourage quicker turnover, ultimately making your running form work more efficiently.
Treadmill Running Workout: Interval Speed Work
Treadmill Running Workout: Part 1
The first set we’re doing is 2 minutes of a fast run, or about 7/10 perceived effort, followed by a 1-minute easy jog. And you’re going to repeat this 5 times.
If you’re totally gassed after you’re first 2 minutes, feel free to walk for a minute if an easy jog is too much for you.
As you work through your 5 rounds, try to find that perfect 7/10 “fast” speed, where you still have just enough energy to maintain an easy jog for the 1-minute segments.
Treadmill Running Workout: Part 2
Next, we’re going to up our speed and shorten our intervals. This time, we’re doing 1-minute fast runs of about 8/10 perceived effort, followed by 30 seconds of an easy jog or walk. And this time we’re doing 6 rounds of that pattern.
Again, the treadmill speed will be different for everyone, but do make sure you’re going faster on this set than you were on the previous one, basing your numbers off of perceived effort! Here we’re aiming for an 8, with 10 being maximum all-out effort.
Treadmill Running Workout: Part 3
Last interval set! Now we’re cutting our fast runs to 30 seconds, with 15 seconds of rest, and we’re going for 6 rounds.
This time, up that fast speed to a 9/10 perceived effort, just about as fast as you can go while still being in control on the treadmill.
If this workout is too difficult, no worries! Decrease the level of difficulty by keeping the structure the same, and just taking out 1 or 2 of the rounds for each section.
Treadmill Running Workout: Cool Down
After all that great speed work, a good cool down is very important! Make sure to walk for 3-5 minutes at an easy pace, letting that heart rate return to normal.
After that, hop off the treadmill and do some mobility work, whatever you feel your body needs!
If running on the treadmill will be a regular occurrence in your training, we’ve got you covered! Learn how to run indoors, how to safely get off the treadmill without interrupting your workout, and what to look for in your posture and cadence with this video on treadmill running form.
And once you’re ready for an added challenge, try this uphill treadmill running workout to get the incline going so you’re ready for those hills when you hit the trail!
Tricks + Tips on Starting to Run
How To Warm Up Before Your Run
Whether you’re a beginner or a pro, no runner wants to waste the first half of their run just getting warm. A proper run warm up will help us run faster and prevent injuries throughout the entire run.
- Step 1: 5-10 Minute Easy Jog
- Step 2: Hips + Hamstrings
- Step 3: Lower Leg
- Step 4: Speed Work
Step 1: 5-10 Minute Easy Jog
To start, just go for an easy jog for 5-10 minutes. This will get the blood flowing so your muscles can start to warm up, and it will raise your heart rate slightly and get your body used to that feeling.
Step 2: Hips + Hamstrings
Next, we’re going to warm up two muscle groups that can make or break our run: the hips and hamstrings.
To get the hips moving, we’re going to do some air squats. For these, make sure your feet are just a little wider than hips’ width apart, keep your weight back toward your heels and your chest up tall as you squat down.
To get the hamstrings loosened up, we’re doing leg swings. Simply stand on one leg and swing the other leg back and forth, going as high as you can without hunching or arching your back, and without bending your standing leg.
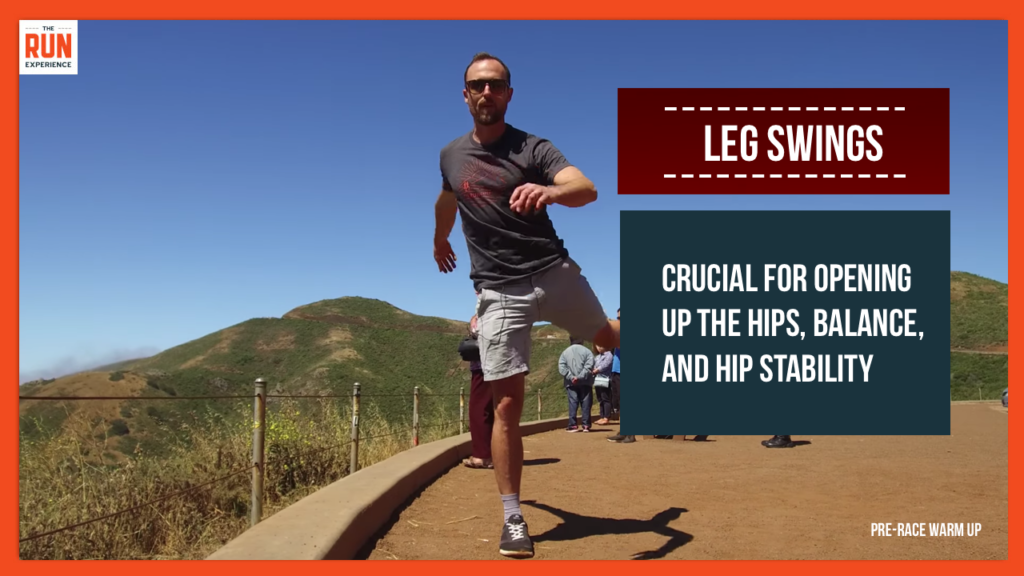
For the format, try 1 air squat and 1 leg swing on each leg, and then 2 air squats and 2 leg swings. Keep increasing your count until you complete 5 reps of each movement.
Step 3: Lower Leg
Much like our hips and hamstrings, our calves too can make or break a run! These walking variations to warm up the lower leg don’t take up too much space, so they’re easy to do anywhere.
To start this portion of the warm-up, we’ll do 20 steps up on your toes. Try to keep your heels as high off the ground as possible for all 20 steps.
Next, you’ll 20 steps on your heels, again keeping your toes as high off the ground as possible the whole time.
After that, carefully roll your weight onto the outsides of your feet, giving the outside of the ankle a stretch. Take 20 steps in that position. If your ankles are loose from spraining or rolling them previously, be extra careful on this one!
For the next 20 steps, rock your weight toward the insides of your feet, and maintain that position the best you can for all 20 steps.
From there, take 20 steps on flat feet with your toes turned outward. This will get our hips involved as well as the lower leg. Then, reverse that and turn your toes inward and take 20 steps in that position.
Now, to get the heart rate up a little while we work the lower leg, we’ll take 20 hops on each leg.
Step 4: Speed Work
Lastly, in this warm up, we’re going to get our muscles used to activating quickly and correctly with some speed work.
All we’re going to do here are four 60-meter stride outs. The distance doesn’t need to be exact, but a stride out means we’ll start at roughly 45% of maximum speed, and work our way up to about 85% of maximum speed over the 60-meter run.
Repeat that 4 times and you’re ready to run.
By incorporating this warm up into your beginner running routine, you’re preventing injuries by getting your muscles ready for whatever comes their way, and ultimately ensuring your best possible run!
How To Stretch After Your Run
Stretching is crucial in keeping you healthy and injury-free. To get you going, check out this video on how to stretch after your run.
The key is here to incorporate these static stretches after your run when your muscles are warm and you’ve gotten your blood flowing.
This way, you won’t strain anything by going too far in a stretch, and your body will be more receptive to the stretches.
And when your body is receptive to the stretches, it adjusts and adapts, and you’ll start to see your flexibility improve over time.
3 Beginner Running Pacing Tips
Pacing your run can seem like a myth to beginner runners – the idea that you can decide how fast to run at any given point in your run seems like a stretch. But it’s easier than you might think!
Beginning runners often fall into two different categories when it comes to pacing. The first is that group who loves the intensity of a fast pace, and who takes off at the beginning of a run, at a pace they are unable to maintain beyond the beginning of the run.
The second category are of those who are excellent at finding a pace they can maintain, so much so that their speed never improves because they get stuck in that “comfort zone.”
- Tip #1: Know Your Tendencies
- Tip #2: Change Your Terrain
- Tip #3: Stick To A Training Plan
Tip #1: Know Your Tendencies
In order to correct our pacing, we need to know what we’re already doing. To get a sense of this, grab your phone, watch, or a stopwatch, and simply measure some stats on your next run.
If you’re using a smart phone, apps like Strava or Map My Run will track your splits for you. And if you’re using your watch or a stopwatch, track your splits yourself by just measuring how long it takes you to run half or a quarter of your total run distance. Whatever markers are available to help you measure will work!
Tip #2: Change Your Terrain
In order to perfect our pacing, we need to introduce our bodies to different paces and step out of our running comfort zone.
A natural way to do this is to change the terrain or course you’re running. If you normally run on a track or a flat road, find a trail to add some hills. If you always run the same trail, find a new one.
This will inevitably introduce your body to different speeds at different points in your run, due to varying levels of difficulty at different spots.
Another easy way to do this is interval running. No matter your course, try pushing your pace and running quickly for 60 seconds, followed by 60 seconds of easy jogging, for 10 rounds.
This will show your body what it feels like to run faster or slower, as opposed to that one speed you’re used to.
Tip #3: Stick To A Training Plan
We at The Run Experience love training plans for runners because they get you thinking in the long term, and they hold you accountable!
Pacing work will only help your run speed if it’s kept up over time, so try to make or find a training plan that will hold you accountable for your runs so that you see results.
Without a training plan, you’ll just be basing whether or not you run that day on how you feel, which can be a slippery slope on both ends. If it’s a day you should be training but you’re tired or sore, you might skip it without a training plan.
And on the other side of the spectrum, if you’re feeling good on a day that should be your rest day, you might not take a rest day that week, which impedes recovery.
How to Start Running FAQs
How to start running again when it’s been a long time?
Take it slow. Some muscles may be weaker than others, and depending on what caused you to stop running, you may have muscle imbalances. That’s okay!
Just take your time and work back into things. If you’ve been out of action for a few years, you’ll need time to recollect your fitness—so be patient with yourself.
How to start running when out of shape?
It’s hard to start running when you’re overweight or out of shape—but it’s far from impossible. Start small. You don’t need to sign up for a 5k or a marathon or anything like that. You don’t even need to start with a mile.
Start with walking. Progress to faster walking. Then begin doing slow jobs. Then move on to running. That could all happen in the course of a month or a year—that’s entirely up to you.
How to start running at 50?
Of course, you’ll always want to consult with a doctor (just in case), but start running at 50 isn’t much different than starting at 20 or 30. You’ll want to start slow, focus on your form and technique, and build up slowly.
Take extra time for rest days and recovery—and don’t forget about your diet, too.
Get Out and Start Running
Find a training plan for beginners that works for you! From there, take note of your pacing tendencies and vary your running terrain to get your body comfortable at different speeds. Come race day, you’ll control how fast you run given what the course requires!
How you keep running is just as important as how you start running.
Download The Run Experience App for more tips, videos, training plans, and tutorials on how to start running right from the get-go and into the future.
